Interested in conducting usability testing for your website or app? This guide will help you get started.
According to UX researchers, 85% of usability problems can be detected by five representative test users.
That’s right – only a handful of test participants can troubleshoot your product for you.
Successful companies such as Dell, Slack, and WordPress are well known for reaping the benefits of usability testing. Follow our guidelines, and you’ll also be in a prime position to do so.
In this guide, you’ll learn how to do usability testing in seven steps:
- Determine your research objectives.
- Write usability task scenarios.
- Decide your testing methods.
- Develop a usability test plan.
- Recruit user testers.
- Conduct usability testing sessions.
- Write a usability testing report.
Step #1: Determine your research objectives.
In the context of user testing, research objectives are hypotheses that you want to test with real users.
When establishing your research objectives, try to answer the following questions:
- In the broadest sense, what are you trying to accomplish with the usability test? Depending on your product, the answer to this may look something like “improving the sales of my e-commerce store” or “reducing the cart abandonment rate”.
- Let’s dive deeper: what feature or process determines the success or failure of what you’re trying to accomplish? Going back to the first two examples, the features you may want to test are the calls-to-action (to drive sales) or the transaction forms (to convert more shopping carts into purchases).
- Now, narrow down even further and ask yourself: what are the user pitfalls that get in the way of what I’m trying to accomplish? Formulate research questions around these pitfalls and be specific. Potential answers may look something like “are my calls-to-action visible to users?” or “are my product description too long?”
Now that you have specific research questions that you can test, it’s time to turn these questions into objectives.
Testing usability works best when your research objectives are:
- simple;
- specific;
- actionable.
For this reason, we recommend you create distinct objectives that cannot be misinterpreted. Pick a specific feature or process, and focus your testing on that. If you’re testing your e-mail signup flow, you may want to establish an objective such as “identifying usability issues in the e-mail signup flow”. This objective is still relatively broad, but it allows you to create more specific task scenarios that you can use to test the usability of your signup forms.
In the end, though, there are no “right” or “wrong” objectives. User testing can be used to fulfill a wide range of business goals and as such, you need to look at your goals from a business-specific point of view.
Now, it’s time to start writing some high-quality task scenarios for your test subjects.
Step #2: Write usability task scenarios.
Usability task scenarios – sometimes referred to as the “beating heart of a usability test” – can determine the success (or failure) of a user test.
In essence, usability tasks tell your user:
- where they need to go;
- what they need to do.
Seems easy enough, right?
Indeed, the basic principle of writing usability task scenarios is very simple. Yet, it’s one of the most critical steps of conducting a usability test that must not be overlooked. Don’t make the mistake of skipping over this step quickly. Otherwise, your user test data may give unactionable – or even worse – inaccurate information.
Creating usability testing task scenarios involves two steps:
- Create test tasks.
- Write test task scenarios.
What’s the difference between the two?
Test tasks are the basis for writing your task scenario. They are general missions that you want your users to accomplish, such as “buy a vacuum cleaner from our website” or “download our app from the App Store”. Test tasks are purely for planning purposes and are not given to the actual users testing your product.
Let’s use an example – try to imagine yourself in the role of a usability tester at Amazon. One who has been given the task of evaluating the user experience of buying a laptop at Amazon. In the broadest sense, the test task you’re working with is “buy a laptop at Amazon”.
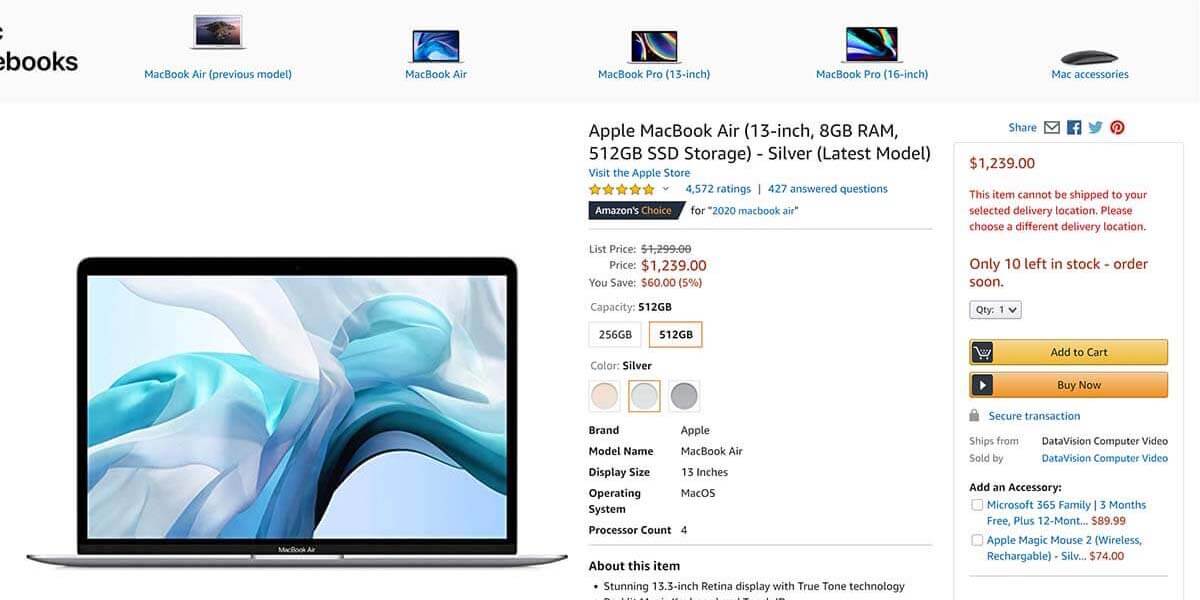
Now that you have your broad test task, you can get into the specifics of what you’re trying to test and establish usability task scenarios.
Task scenarios are what you give to the test subjects. These are long-form, narrative, and descriptive because they are meant to give test users an overview of the background and motivations behind accomplishing the test task. Here you’ll find some real-life examples of usability task scenarios.
Going back to our Amazon example, a usability task scenario here could include going through the entire buyer journey. Such a usability task scenario would allow you to evaluate various aspects of the user experience.
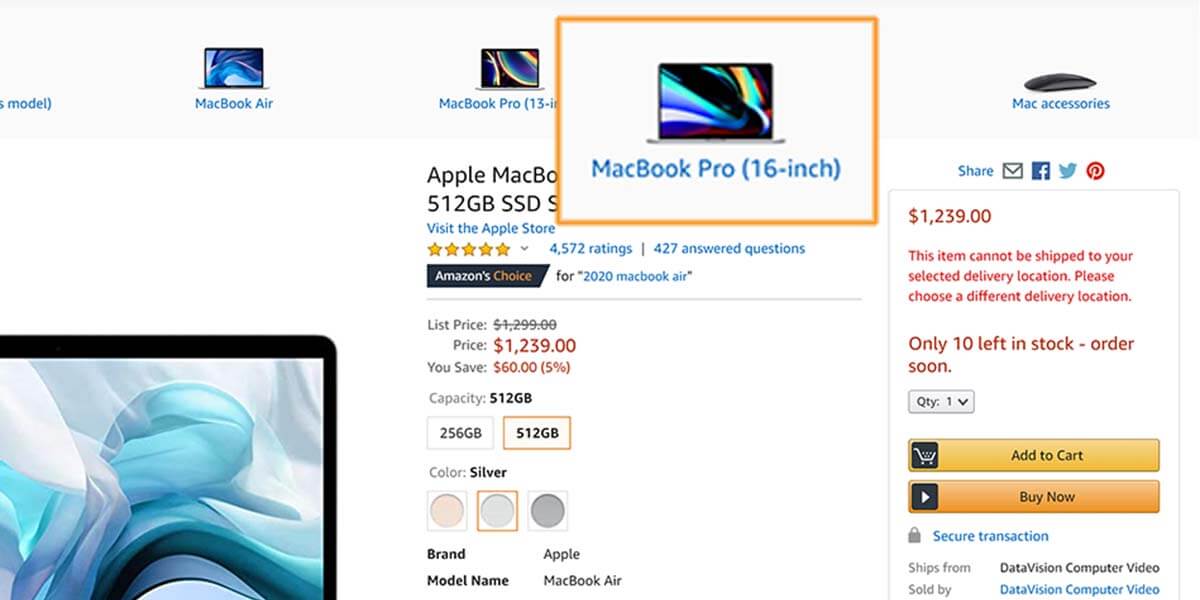
For example – can the test participant spot the option of upgrading to a bigger (and more expensive) 16-inch MacBook?
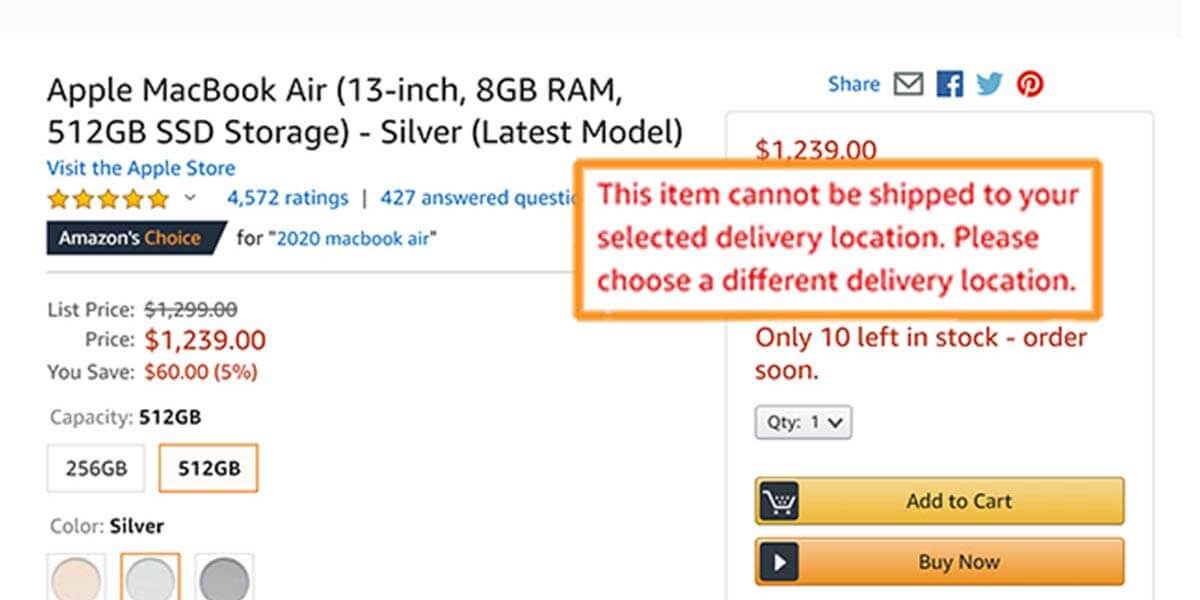
Or, perhaps you’d like to test whether the buyer notices that the product cannot be shipped to their location.
When writing usability tasks, make sure you always have your main objectives and end goals in mind. Both your test tasks and task scenarios should reflect on your end goals, as this will allow you to gain qualitative data on any user experience pitfalls.
Step #3: Decide your testing methods.
Now that you know your user research objectives and task scenarios, it’s time to decide on the scope, format, and setting of the test.
User researchers from the NN/g highlight the following three categories of user testing research formats:
- in-field vs. in-lab;
- unmoderated vs. moderated;
- remote vs. in-person.
Another interesting subcategory of user testing methods involves using eye-tracking technology. According to UXmag, eye tracking is one of the best user testing methods for rich applications. That is because eye-tracking allows test observers to see precisely where users are looking, instead of having to guess. For measuring unconscious behavior, eye-tracking tools are indeed a useful tool.
To give you a better overview of what conducting eye-tracking usability testing looks like, here’s a quick introductory video from NN/g:
Despite being strong advocates of eye-tracking methods, we always recommend using a combination of user testing methods rather than relying entirely on a single method.
Each testing method comes with advantages and disadvantages. Once again, there are no “right” or “wrong” options here. You need to look at your research objectives and task scenarios to figure out what format will suit your focus group the best.
For example, if you’re testing the usability of a CTA on your website or app, a remote testing format with a large sample size could be the way to go. That is because a remote format will allow you to work with a smaller budget and without geographical barriers. But, there are sacrifices. A remote testing method will give you fewer data points and it’s more difficult to get a complete overview of user behavior in a remote setting.
Once you’ve decided on the testing methods, it’s finally time to start recruiting people that represent your target audience.
Step #4: Develop a usability test plan.
Once you have your usability testing research objectives, task scenarios, and methods in place, it’s time to document everything in a usability test plan.
The elements of a usability test plan should always include the following:
- scope of the test;
- purpose of the test;
- testing schedule and location;
- usability session descriptions;
- test participant information;
- usability task scenarios;
- data collection metrics;
- usability testing roles.
This document will serve a central role during the entire usability testing process. It will enable people unfamiliar with the details of the study to become up-to-date quickly, avoid confusion between team members, and streamline the development process for future studies.
Ideally, you’ll want to start off with a draft version of a usability test plan that you can circulate between various team members. Then, the draft plan can be updated and revised based on comments and suggestions, resulting in a more robust usability test plan.
Once you have your final user test plan agreed upon, you can move onto the next step – recruiting test subjects.
Step #5: Recruit user testers.
How many user testers you recruit depends on the type of study you are conducting.
Qualitative usability testing typically requires a smaller amount of participants (NN/g recommends 5 participants for the best ROI if you use a single focus group).
Quantitative usability testing, on the other hand, requires a larger sample size to gain any valuable insights. NN/g recommends at least 20 and 30 participants in each focus group. Quantitative usability testing is often a must when using eye-tracking software or when testing a content-rich website.
As for the test subject recruitment process itself, there are four common types of user recruiting methods to choose from.
A. Hallway testing
Hallway testing, also known as guerilla testing, is a fast and informal method of recruiting participants for your usability study. It involves setting yourself up in a high foot traffic area (a hallway) and recruiting people who happen to walk by.
It goes without saying that hallway usability testing does not work in all cases. But at the same time, it’s a method that is all too often skipped without consideration.
Here’s Boris Masis conducting a guerilla usability test in Google’s California office:
Hallway testing has certain advantages over other recruiting methods, such as:
- very cheap to set up;
- time-efficient;
- quick validation or invalidation of the early design process.
Hallway testing, however, also brings many disadvantages:
- test participants will likely not match your target audience;
- not enough time to gather exhaustive data;
- proper vetting of test subjects is difficult to achieve in a hallway setting.
While hallway testing can help you reveal any immediate glaring issues in user experience design, it will never replace formal user testing. That is, if you want to gain valuable data-driven insights. If you’d like to learn more about hallway testing, digital.gov has written down some tried-and-tested tips for setting up a hallway usability test.
B. Testing on existing users
If your website or app already has an existing user base, you’re in luck. Recruiting the same people who are already using your product as test users can be both efficient and insightful.
One of the most popular forms of testing on existing users is A/B testing and it involves conducting randomized experiments where your users are served one of two design variants – either A or B. This allows you to experiment with multiple design iterations without having to conduct separate usability studies for each design iteration. A/B testing, though, is a massive topic on its’ own that we’ll cover in future articles.
Recruiting existing users as test participants is a method that comes with various benefits:
- highly accurate representation of your target audience;
- lower cost compared to recruiting from agencies;
- if you have a newsletter, recruiting people only requires their email address
On the other hand, recruiting people who are existing users also has some drawbacks:
- people who have used your product extensively don’t accurately represent new users;
- existing users can be positively biased towards you and your product.
If you’d like to learn more about the advantages and disadvantages of testing on existing users, UserZoom has put together an excellent article on why you need to test UX design with non-users.
C. Recruiting freelancers from online marketplaces
In this context, by online marketplaces, we mean websites such as:
- Fiverr;
- mTurk (Amazon Mechanical Turk);
- Craigslist;
- freelancer.com.
The majority of these online marketplaces work in the following way:
- you post an advertisement for recruiting test users;
- you find individual freelancers for hire and invite them to the project.
Here’s an example of a user testing freelancer advertisement on Fiverr: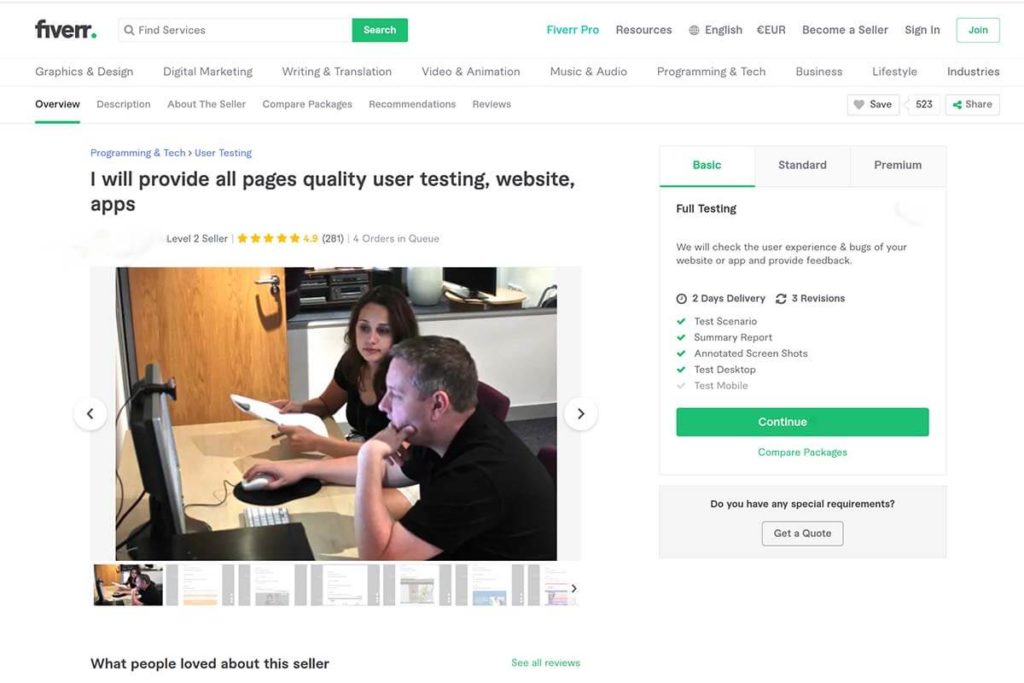
Using online marketplaces to find test participants can be effective if done right. These are the main advantages of hiring freelancers from online marketplaces:
- you can see the review ratings for each prospective test subject;
- easy to find a large sample size of user testers quickly;
- due to the ferocious review system, freelancers are motivated to provide a good service.
But, keep in mind that using platforms such as Fiverr for usability testing also has some significant drawbacks:
- freelancer ratings can be manipulated;
- experienced freelance user testers don’t always accurately represent your target audience;
- freelance marketplaces typically charge around 20% as a service fee.
Some freelancers are far better than others, and some are far more expensive than others. Hiring freelancers to do usability testing can work very well in some cases, but we do not recommend it as your only recruitment method.
D. External recruiting firms and agencies
Having an experienced market research agency do the recruiting for you will often yield the best results. But, this option comes with a significant downside: the price. Agencies specializing in usability testing tend to charge between $100 and $300 per user.
If you’re aiming for a large-scale usability study, the costs can start stacking up very quickly if you’re relying on an external recruiting firm. For example, a moderated study with 50 qualified participants can run you about $33,000 in recruitment costs and honorariums. To make such a large commitment worth it, the product or feature you are testing has to have large value for your business.
In the end, though, you get what you pay for. If you hire a respected user research agency, you can be confident in the data and insights that were gained from the usability testing process. Leaving the bulk of the usability testing workload to an external company also enables you to save the most valuable asset you have – time.
To sum it up, these are the advantages of using user testing services from external firms and agencies:
- more confidence in test results;
- less time spent on usability testing;
- everything is managed for you;
- faster results compared to in-house testing.
Yet, we don’t recommend relying on an external agency to most companies, because:
- very high costs;
- research objectives have to be laser-focused and profit-driven to be cost-effective.
Now we’ve gone through all the primary types of usability tester recruitment methods. If you’d like to learn more about recruiting people, take a look at this massive 190-page report from NN/g on recruiting participants for usability testing. You could also check out one of the largest usability testing recruiting platforms – UserTesting.com.
Step #6: Conduct usability testing sessions.
How you conduct your usability testing sessions largely depends on the chosen scope and format. However, the basic elements of a usability testing session always remain the same – the users try to complete task scenarios while the observers supervise the sessions.
What you find during the sessions can be devastating at times. These devastating findings, however, will help make your product more human-center and user-friendly.
There are three distinct roles involved in a typical usability testing session:
- interviewer;
- user tester;
- observer.
The role of the interviewer is to assist the user tester by explaining the task scenario. The word “assist” is crucial here, because the interviewer should never take control of the user who is testing usability. Interviewers have to stay neutral to avoid corrupting the user experience data.
The role of the user tester is to perform usability task scenarios. User testers should be as similar to the target audience of the website or app as possible. That is because this ensures an accurate representation of the end-user. While performing usability tasks, the users testing the product should think out loud and explain their thought processes in as many small details as possible.
The third role in a usability testing session is that of the observer. Their role is central to the user research process, as they are the ones who observe the test participants and take observational notes. It’s important to note here that the observer should avoid offering solutions and design insights at this stage of the user testing process. Instead, they should be fully focused on taking notes and gathering as much data as possible. To aid the observers, consider using screen sharing software or heat maps to accurately measure the mouse movements of participants.
A successful user testing session ensures that communication between these three roles is efficient, organized, and purposeful. Before you start conducting your usability sessions, make sure that everyone involved in the process knows what they need to do, what they don’t need to do, and what are the objectives of the study.
Step #7: Write a usability testing report.
Now that the usability testing sessions are all set and done, it’s time to write a report with all your findings. When reporting usability test results, try to rank the severity of any usability issues you discovered during the sessions. Make sure that any glaring issues in user experience design are highlighted clearly, together with descriptions of the problems.
When writing your usability testing report, you’ll also have to consider whether the data you collected is quantitative or qualitative.
In the case of qualitative data, make sure to compile and highlight the notes that the observers took during usability sessions. Group any similar observations according to themes and sub-themes with any relevant recordings added to the report. Visuals are also important – try to turn all qualitative data into visual reports to highlight any discoveries made during the test sessions. Here’s an example of a qualitative usability testing report by David Ghent of Pivotal.
In the case of quantitative data, try to make use of spreadsheets and calculations. Highlight the success rates, task scenario completion times, error rates, satisfaction rates, and any other quantitative metrics you gathered during the usability sessions. CXL recommends choosing from two metrics when compiling a quantitative usability report: system-level metrics and task-level metrics.
Here are 3 more free usability testing report templates that you can use as a basis for writing your report.
Usability testing FAQs
Next, we’ll answer some of the most frequently asked questions about conducting usability testing:
What does usability testing do?
Usability testing allows product developers to map out the behavior of real users and gain insight into how and why people interact with the product. Well-planned usability tests can reveal and fix customer pain points before commercialization, and this enables companies to reduce development costs and improve customer satisfaction.
How much does usability testing cost?
The cost of conducting usability testing depends on the scale and complexity of the chosen testing methods. Small-scale qualitative usability tests can sometimes be carried out for free, while large-scale quantitative tests that utilize multiple focus groups and many test participants can cost upwards of six figures.
When should you do usability testing?
User testing can and should be conducted at every stage of the design process. Generally speaking, though, early user testing tends to be more cost-effective than late-stage user testing. That is because early testing highlights any differences between the intended and real behaviors of users before committing resources into product development.